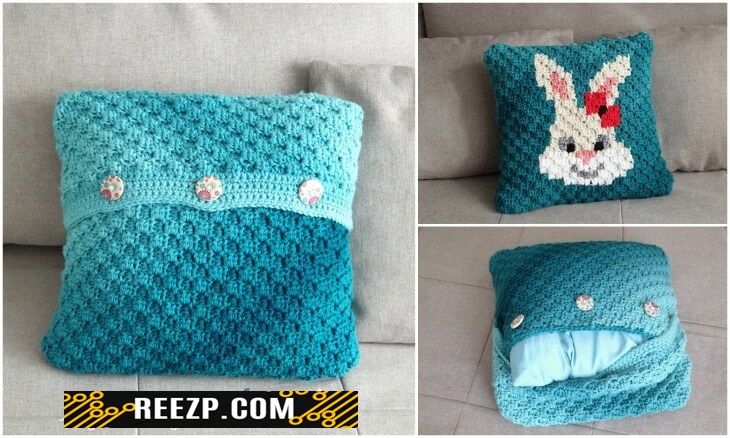
Removable C2C (Bunny) Pillow Case – Free Crochet Pattern
Learn how to crochet an envelope style of C2C pillow case that you can easily remove for washing or change it every time you want.
This removable C2C pillow case design will be the base for all my Animal C2C pillow cases.
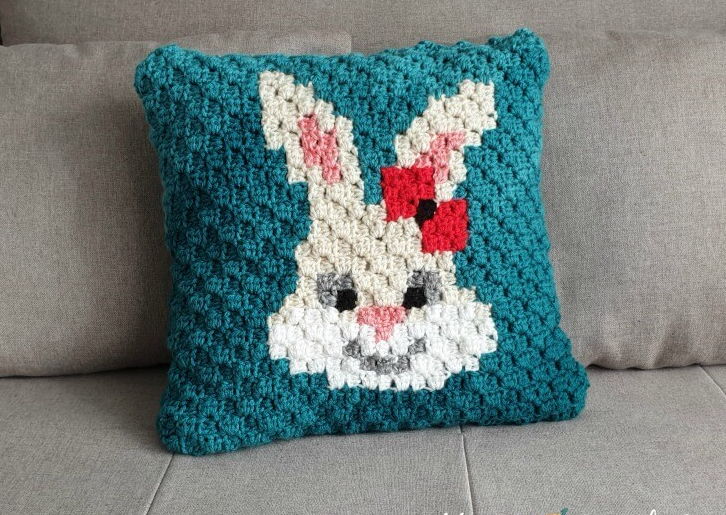
For the front side of the pillow case, you can choose any of my Animal C2C Square patterns
You could also make a plain C2C Square of 26 x26 tiles.
The Sassy Bunny Pillow Case would be great to decorate your couches and chairs for Easter, but also to decorate a baby’s/child’s room!
For the back side you will work 2 rectangles of different sizes:
– one panel of 26 tiles x 10 tiles (R1)
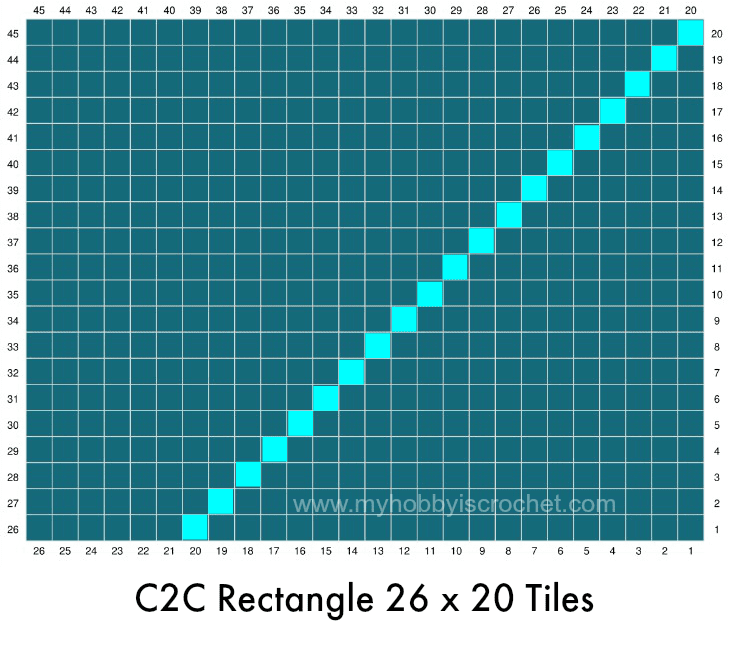
– one panel of 26 tiles x 20 tiles (R2).
SUPPLIES (for the Back Panels):
– 200 g of Red Heart Super Saver – I have used Red Heart Ombre Deep Teal)
– 5.5 mm crochet hook (shown here my Furls Wooden Hook, Cocobolo)
– Tapestry needle
– Scissors
– 3 wooden buttons of 30 mm
SIZE: fits a 16 inches X 16 inches square pillow
STITCHES AND ABBREVIATIONS (US Terms):
– ch: chain
– slst: slip stitch
– ch2sp: chain two space
– ch3sp: chain 3 space
– st: stitch
– sc: single crochet
– hdc: half double crochet
– RS: right side
– WS: wrong side
– begin: beginning
– sc: skip
– rep: repeat
– yo: yarn over
– R1- rectangle 26 x 10 tiles
– R2 – rectangle 26 x 20 tiles
INSTRUCTIONS:
The same as the square front panel, the 2 rectangular back panels are worked with the Corner to Corner (C2C) technique using the hdc (half double crochet) stitch.
You will work each piece on the diagonal starting from bottom right corner to top left.
How to Crochet a C2C Rectangle with the hdc
If you have never worked a C2C Rectangle/ Square in hdc, I would recommend you to watch the video tutorial embedded at the end of the instructions below.
Row 1: Start with ch5. Work 1hdc in 3rd ch from hook and 1 hdc in each of next 2 ch. (The 2 skipped chains at beg of row will be a ch2sp).
You made the First and only Box Stitch of row 1!
From now on, you’ll start increasing 1 box st in each row.
Row 2: Turn your work, ch 5, turn, work 1 hdc in 3rd ch from hook and 1 hdc in each of next 2 ch. (1st. box st of the 2nd row made).
Turn your work, sk all 3 hdc of next box st, slst into ch2sp of that box st, ch2, work 3 hdc in same ch2sp. ( 2nd. Box st of the 2nd row made!)
Row 3: Turn your work, ch 5, turn, work 1 hdc in 3rd ch from hook and 1 hdc in each of next 2 ch. (1st. box st of the 3rd. row made)
Turn your work,
*sk all 3 hdc of next box st and slst into the ch2sp at left of that box st, ch 2, work 3 hdc in same ch2sp . (2nd. Box st of the 3rd row made); rep from * for the next box st (3rd. Box st of the 3rd row made).
Continue increasing by 1 tile per diagonal row until you reach the Corner by row 10 for R1 and by row 20 for R2. (See the highlighted diagonal row in the graphs below!)

 After corner you’ll start decreasing (see instruction below!) on one side of the row (top side in graph) and increasing on the other side (at bottom of graph) to keep the total number of
– 10 tiles per row for R1
– 20 tiles per row for R2
until you reach row 26.
After that you will only decrease each row until you get to 1 box st by last row.
How to Decrease Box Stitch/ Corner to Corner (C2C) in Half Double Crochet
Turn your work. Do not chain 5 anymore.
sl st loosely into top of each hdc of the last box stitch made in the previous row, then slst into next ch2sp of last box st from previous row, ch 2, work 3 hdc into same ch2sp.
Watch Maria’s Video below to learn How to Crochet Half Double Crochet Corner to Corner Rectangle:
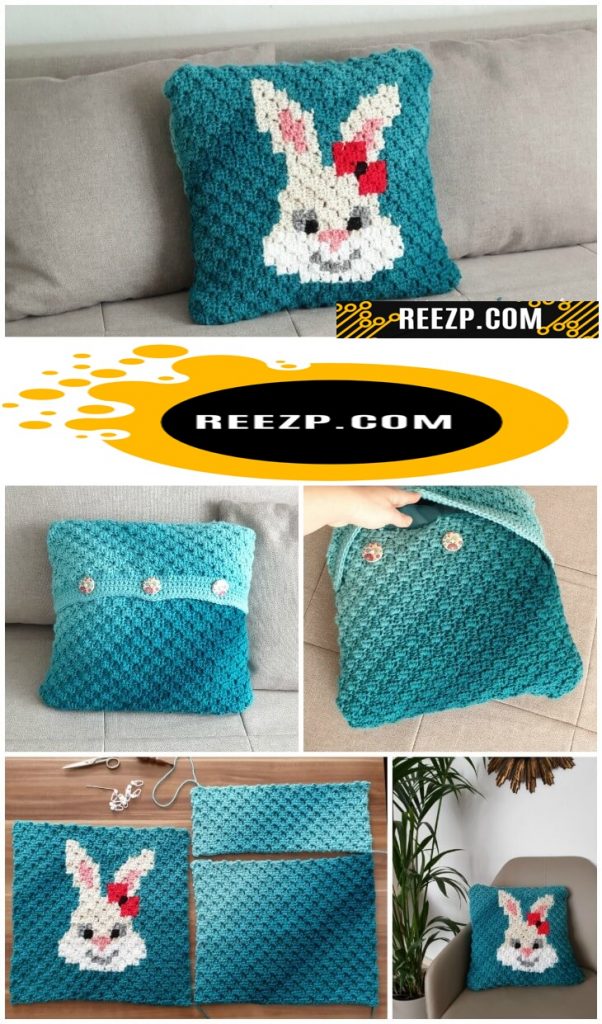
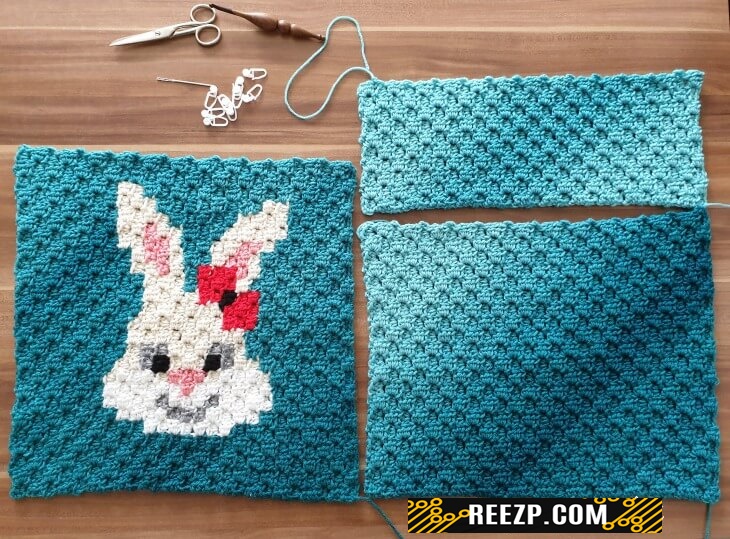
Here are my 3 C2C pieces (the front panel and the 2 back panels):
Now you will crochet a Buttonhole Band for R1.
Row 1: Join yarn with a standing sc into the right upper corner of R1 and work 56 sc evenly spaced along the long edge; turn (57 sts total)
Row 2: ch1, sc in each sc across; turn (57 sts)
Row 3: ch1, (1 sc in each of next 12 sc, ch3, sk next 3 sc) x 3 times, 1 sc in each of the next 12 sc; turn.
You have made 3 buttonholes!
Row 4: ch1, (1 sc in each of next 12 sc, 3 sc into ch3sp) x 3 times, 1 sc in each of next 12 sc; turn. (57 sts)
Row 5: ch1, 1 sc in each sc across. (57 sts)
Cut yarn. Fasten off.
Sc Edging on the upper edge of R2: Join yarn with a standing sc into the right upper corner of R2 and work sc evenly spaced along the long edge.
Cut yarn. Fasten off.
Assembling the front and back panels together:
The 3 pieces will be sandwiched and sewn together using the Mattress Stitch .
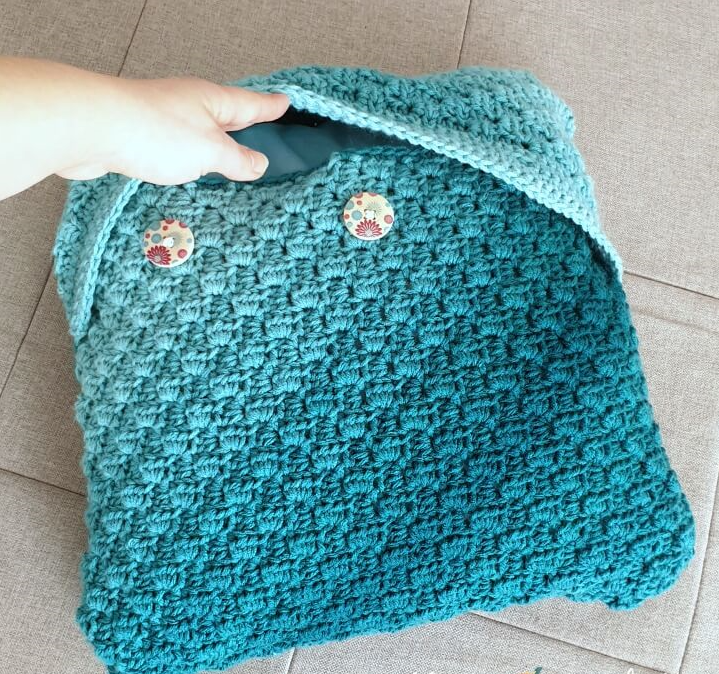
The back pieces will overlap, creating the envelope type of pillow cover.
Sandwich the 3 pieces with the right sides facing together:
First lay down the Bunny (other animal square in my series) with the RS facing you, then place the rectangle with the buttonhole band down over it and pin the top corners together, as in the picture below.
Now place the larger back panel (with the sc edging on top) so that the bottom corners are on top of each other. The back panels will overlap approx. 7 inches (18 cm) creating the envelope. Pin down and sew the 3 pieces together around the outer edges.
Cut yarn. Fasten off.
Once you are done, turn the pillow cover right side out. You can now stuff your pillow into the cover through the back that is open.
Sew the buttons in place.