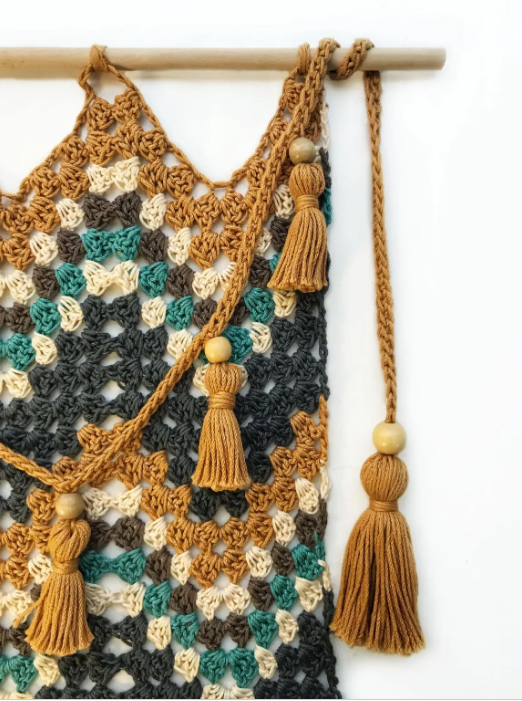
Juniper Wall Hanging – Crochet Pattern
If you are looking for a crochet project that is quick, easy, and also functional, the Juniper Wall Hanging pattern is a perfect fit!
They make great last minute gifts and are a unique addition for market prep! Let’s grab our materials and get started.
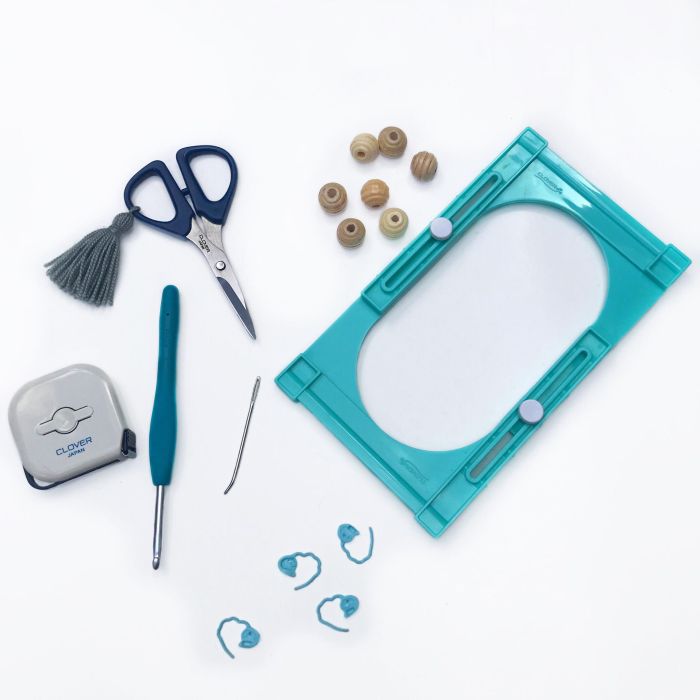
MATERIALS
- 440 yds of Lion Brand 24/7 Cotton or any 4-weight yarn
- 7 – Beads of your choice
- Dowel or Driftwood (18″ to 20″)
- Clover Amour Crochet Hook (4.5mm) – Art. No 1046/7
- Tassel Makers – Art. No 9941
- Mini Patchwork Scissors – Art. No 493/CW
- Tapestry Needle Set – Bent Tip – Art. No 3121
- Quick Locking Stitch Markers – Art. No 3033
DIFFICULTY LEVEL
Easy
FINISHED SIZE
15” x 16” (without fringe)
NOTES
- Pattern is written in standard US terms.
- The chain 3 at the beginning of a row counts as a DC.
- The piece is worked top-down.
ABBREVIATIONS
- CH: chain
- SL ST: slip stitch
- SK: skip
- SC: single crochet
- DC: double crochet
- ST(s): stitch(es)
- RS: right side
- WS: wrong side
- CL: cluster
GAUGE
Not necessary to follow a gauge for this project
STITCH EXPLANATION
Cluster (CL): 3 DC worked into the same chain, stitch or space.
INSTRUCTIONS
CH 70
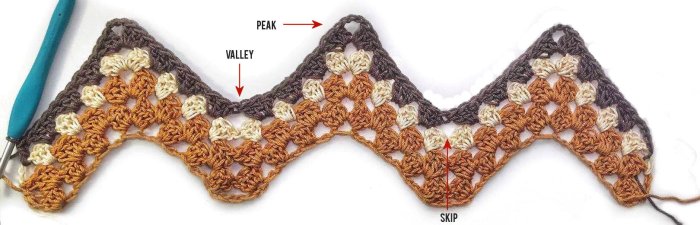
Row 1: DC into the 4th CH from the hook, work 2 DC into the same CH. Sk 2 CH(s), CL into the next CH.
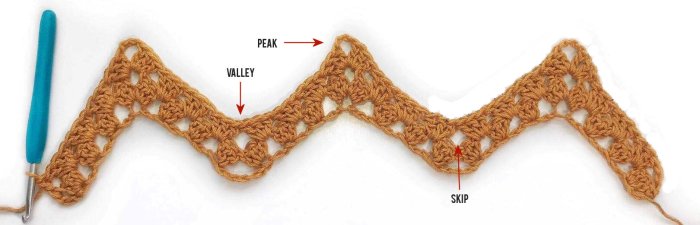
Repeat from * to * 2 more times. CH 3, work another CL into the same CH. (peak formed)
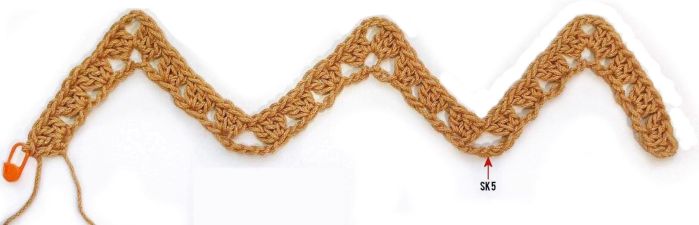
Repeat from * to * 3 more times. SK 5 STs, work a CL into the next CH. (valley formed)
Repeat from * to * 3 more times. CH 3, CL into the same CH. (peak formed)
Repeat from * to * 3 more times. SK 5 STs, work a CL into the next CH. (valley formed)
Repeat from * to * 3 more times. CH 3, CL into the same CH, (peak formed)
Repeat from * to * 2 more times, SK 2, work 4 DC into the last ST. Turn. (24 CL)
Note: Make sure to end with 4 DC in the last chain of your row to match the first cluster and CH 3 of the row. This will only be necessary for row 1.
Row 2: CH 3, CL into the FIRST space (here and throughout space refers to the sk sts between CL worked from the previous row).
CL into the next space, repeat 2 more times. CH 3, work another CL into the same space. (peak formed)
CL into the next space, repeat 2 more times. Skip the “valley” space, CL into the next space. (valley formed)
CL into the next space, repeat 2 more times. CH 3, CL into the same space. (peak formed)
CL into the next space, repeat 2 more times, Skip the “valley” space, CL into the next space. (valley formed)
CL into the next space, repeat 2 more times. CH 3, CL into the same space. (peak formed)
CL into the next space, repeat 2 more times, DC into the CH-3 space from the previous row. Turn. (24 CL)
Row 3 thru 20: Repeat row 2. (24 CL)
ADDING FRINGE
To make your fringe, start by cutting 160 – 32” strands of yarn.
We will be attaching 2 strands of fringe to EVERY stitch along the bottom of the wall hanging.
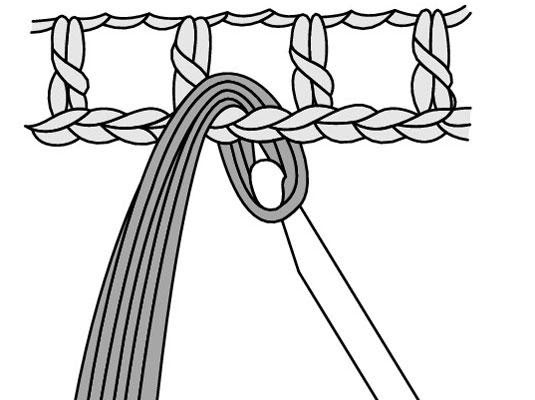 To attach the fringe, insert your hook through a stitch along the bottom of your wall hanging, grab 2 strands of fringe in the center, and fold them in half with your hook.
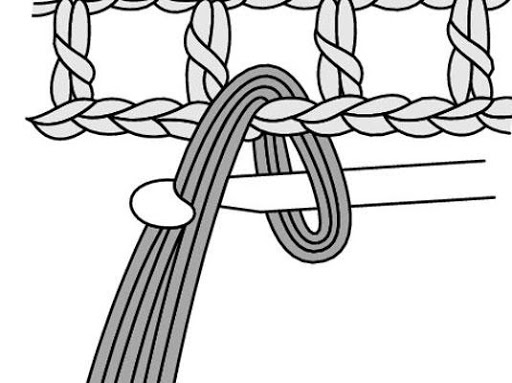 Pull the loops up through the stitch towards you, then yarn over with the ends of the fringe and pull the ends all the way through. Make sure to tighten.
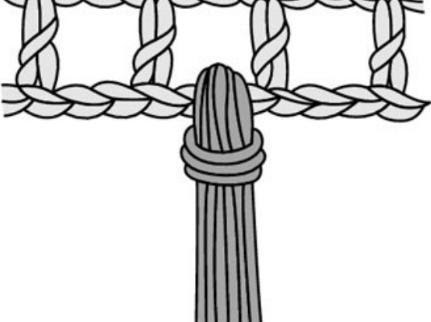 Repeat for each stitch along the bottom of your wall hanging. Trim any uneven strands.
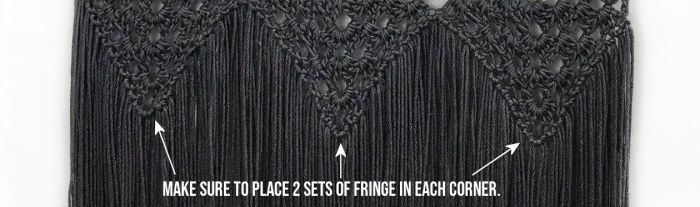 For neater looking fringe, steam it once finished.
ROPE SASH
CH 144
SC in the 2nd CH from the hook and in each ST across. (143)
Fasten off.
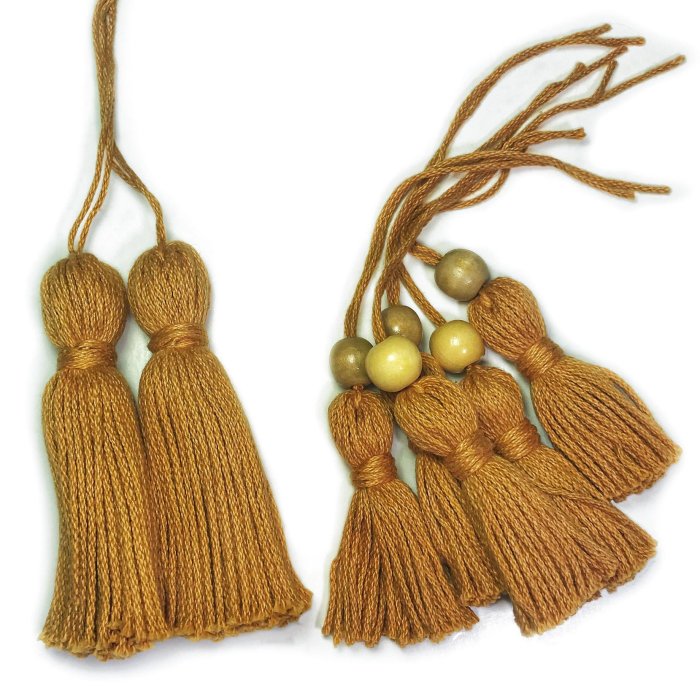
TASSELS
2 – Large Tassels measure 4″ long.
5 – Small Tassels measure 2.75” long.
With your selected color, cut 14 – 8″ strands of yarn. You will use 2 strands per tassel; one will be used as the top tie of your tassel and the other will form the “neck” of the tassel.
I highly suggest using the Clover Tassel Makers to make easy, always-perfect tassels, but if you do not have it follow these directions to make yours…
LARGE TASSELS (2)
Wrap the yarn around a chosen 4.5” object 40 times.
Using an 8″ strand of yarn, knot top of tassel tightly.
Cut the tassel at the opposite end.
Repeat 1 more time.
SMALL TASSELS (5)
Wrap yarn around a chosen 3” object 25 times.
Using an 8″ strand of yarn, knot top of tassel tightly.
Cut the tassel at the opposite end.
Repeat 4 more times.
Wrap the other 8” strand of yarn around the “neck” of the tassel. ? Wrap the tails around the neck of the tassel 3 times and knot the ends together. Use your darning needle to hide the tails in the center of the tassel.
ASSEMBLY
Add a bead to the top of each tassel
Attach one of the 4” tassels to the side of the very first single crochet of the “rope sash,” skip 39 stitches, and attach 1 of the 2.75” tassels. Skip 15 stitches, attach the next 2.75” tassel.
Repeat for the next 3 small tassels. Attach the last 4” tassel to the side of the very last stitch.
Weave in all ends and trim tassels as needed.
ATTACHING TO ROD
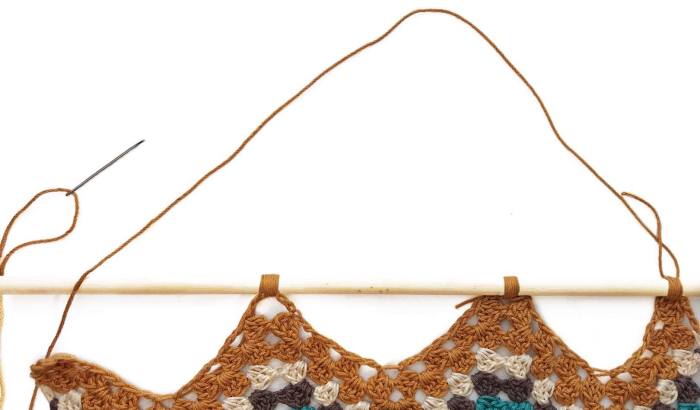
To attach the crocheted piece to your dowel, you will need your needle and a long strand of yarn.
Note: When attaching your piece to the dowel, make sure the top of the hanging is the same width as the bottom so it looks even and straight.
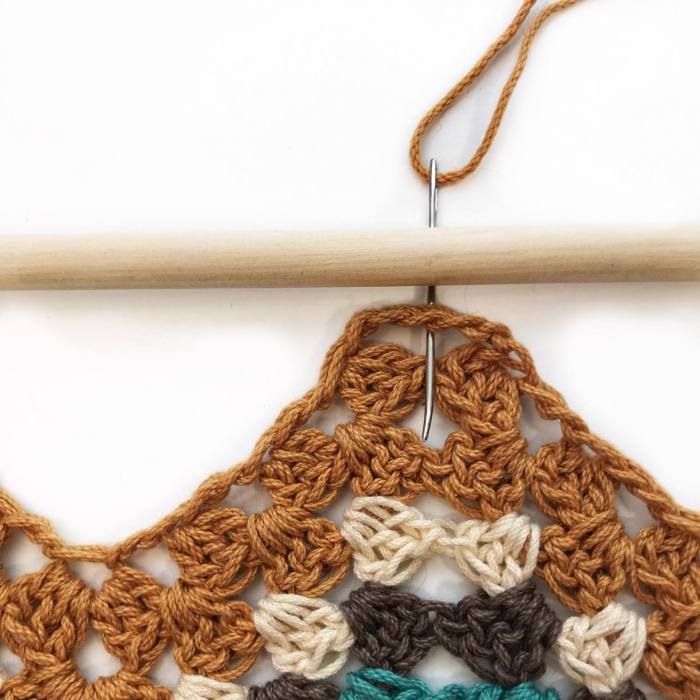 Lay out your piece underneath the dowel, lining it up where you’d like it to be attached.Starting on one side of your piece and coming from the back, insert your needle and pull through until you’ve got about a 6 to 7-inch tail.
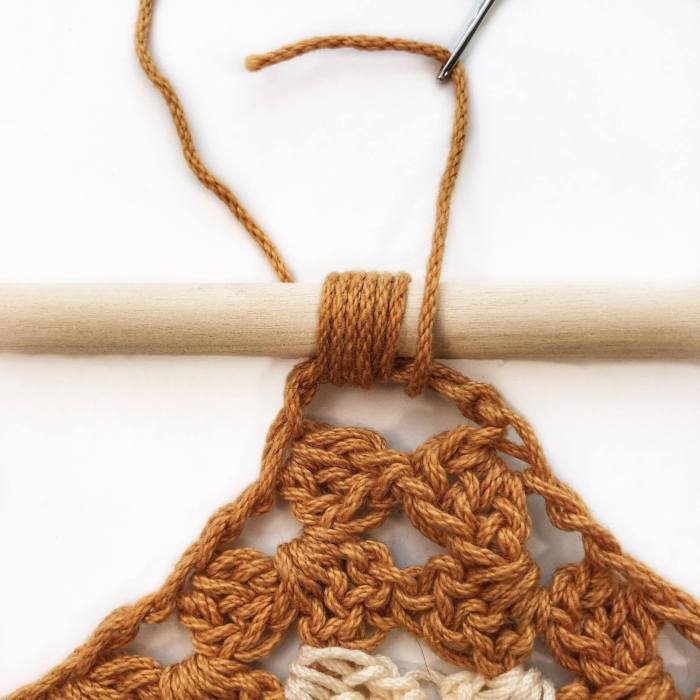 Go over the dowel with your needle and back through the space at the top of the piece about 5 or 6 times, making sure to line up each wrap neatly. Tie off, and weave in your ends.Repeat for all 4 peaks.
 Tie a 30” piece of yarn from the first secured peak to the last secured peak on the opposite side for hanging.
Weave in your ends, drape the sash over the sides of the dowel, position the side tassels where you want them, and now you’ve got yourself a super chic and oh-so-boho wall hanging for your home!