A Stylish Branded Sweater.
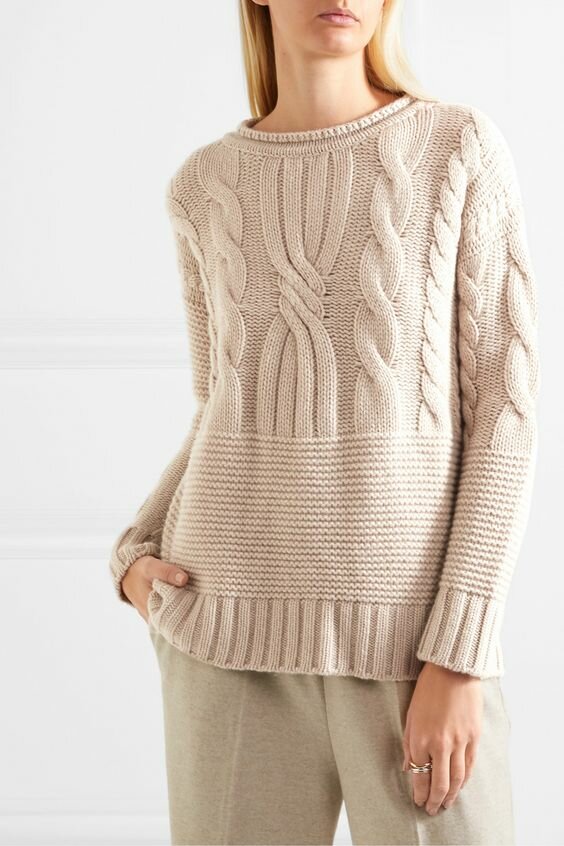
A simple but very stylish branded sweater.
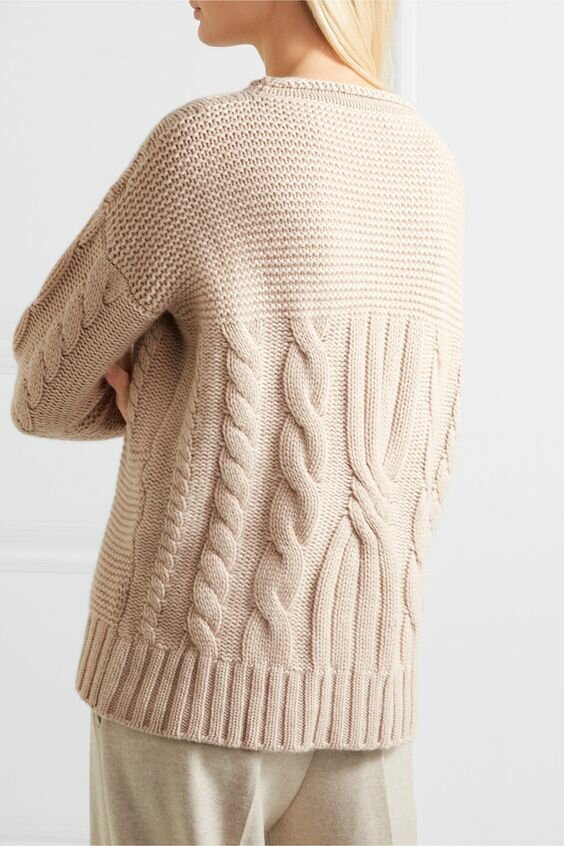
I present the description and knitting pattern for such an interesting sweater. The photo was found in the archive of currently sold products from the assortment of the online store, and the author of the model is unknown to me.
I assume this is a model from a famous designer as the store sells clothes from famous brands. If someone knows the pedigree of this beauty, I will be grateful for the information.
On the back, on the reverse – from below, and from above – there is a garter stitch.
The pattern of the model is the simplest – rectangles from the front and back rows (you can make a shoulder bevel). We knit the sweater from the bottom in separate parts. The sleeves and bottom straps are 2×2 ribbed.
We knit the front and back in the same way. First, garter stitch to the desired height (about 20 cm in the photo). Then we move on to the knitting pattern.
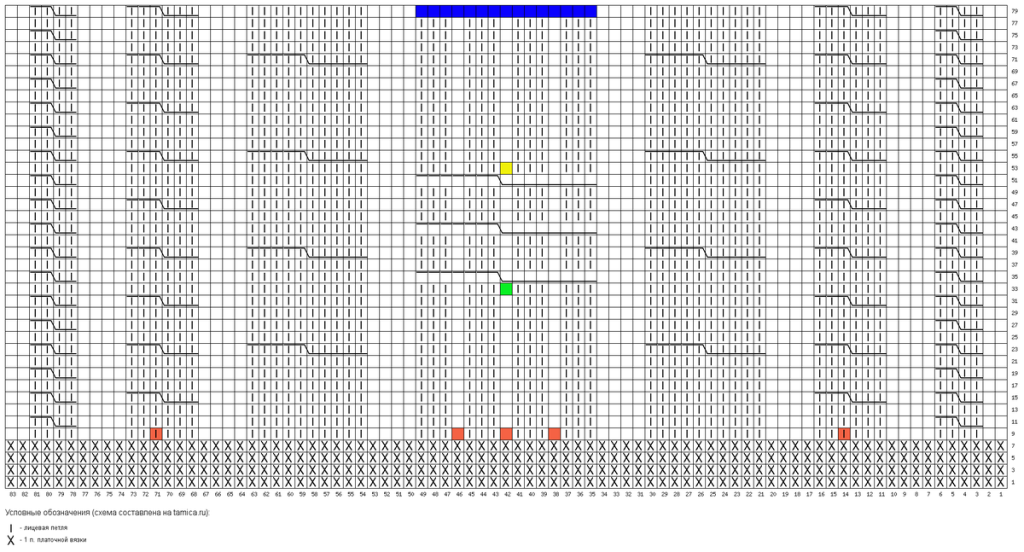
I drew a pattern for the front rows (purl according to the pattern). The sweater in the photo has an 83 loop fit. There is nothing complicated in the model, these are ordinary braids, I will dwell only on a few points.
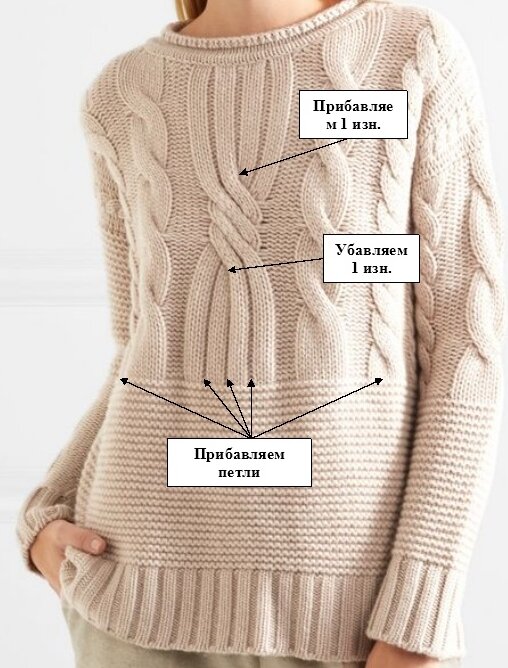
1. The knits will tighten the fabric, so when switching from a garter stitch to an embossed pattern, I would add five loops inconspicuously with the crochet, and these are then knitted in crossed loops. I marked the places where the additions are with arrows in the photo and highlighted them in orange in the diagram.
2. To make it more convenient to cross the loops of the central pattern, I would first reduce the wrong loop in the center (indicated by an arrow in the photo and a green square in the diagram). And after passing, I would add this loop in the same place (yellow square).
We start knitting the door where it is marked in blue. It is round, decorated with a roll. To do this, we simply knit the neck loops with the front surface (8-10 rows). Then the loops are closed and the door itself turns into a cylinder.
The sleeve is also knitted from the bottom up with a gradual expansion. We start with a 2×2 elastic band, then a garter stitch (about 15 cm), and then we move on to the knits. We will not have a wide pattern in the middle of the sleeve as in the front, we will have a ten loop knitting. Then there will be six and four loop knits on both sides as in the front and back.
And in conclusion – about how to expand this scheme. There are only 83 loops, which is not enough for a sweater. To expand the pattern in width, between the knits you can make not 4 loops from the wrong side, but 5, 6 or more (depending on the number of loops we need). Or distribute the missing number of loops left and right and simply tie them with the wrong side. You can add one or two more harmonies from the extreme knits of four loops to the right and left.


