How to Crochet Dress Making
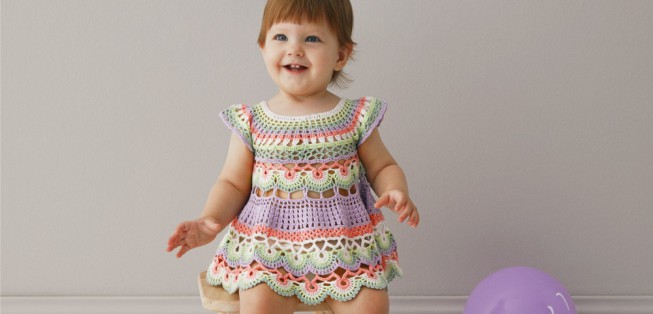
If you want to knit this crochet dress that brings spring to life with its colors, check out our article!
Material : Calico Fine 3782,6707,10331,11222,11452 (1 ball each)
Crochet No: 2,5
Knitting Pattern: Chain, frequent needle, handrail, 3 pull handrail
DRESS:
FRONT+REAR+ARMS:
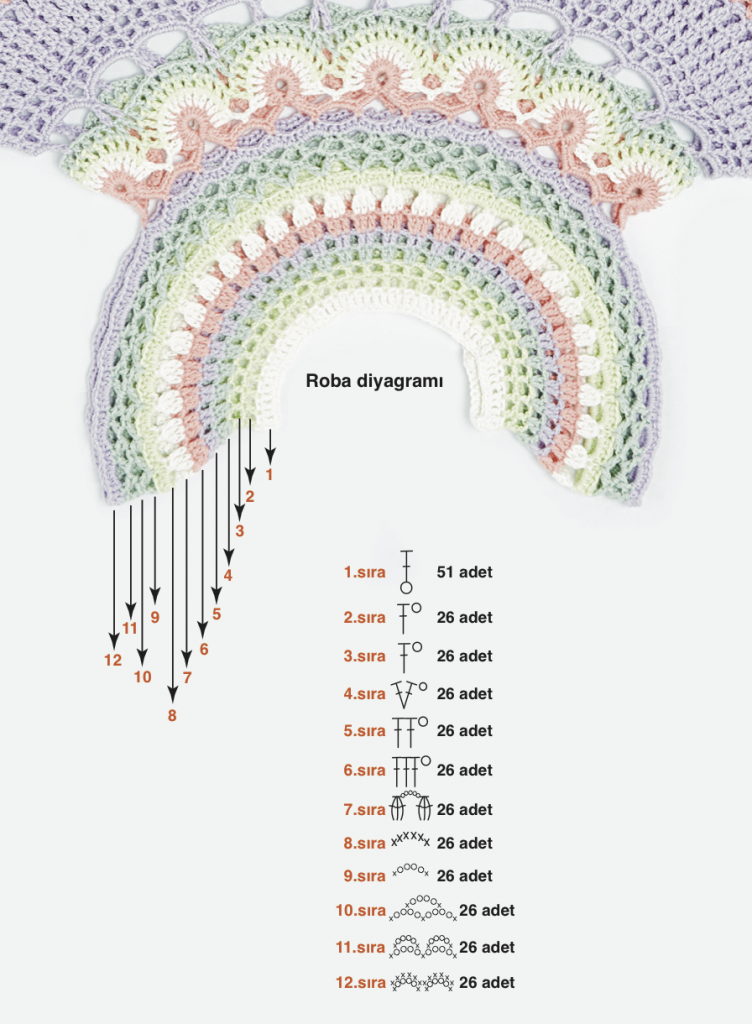
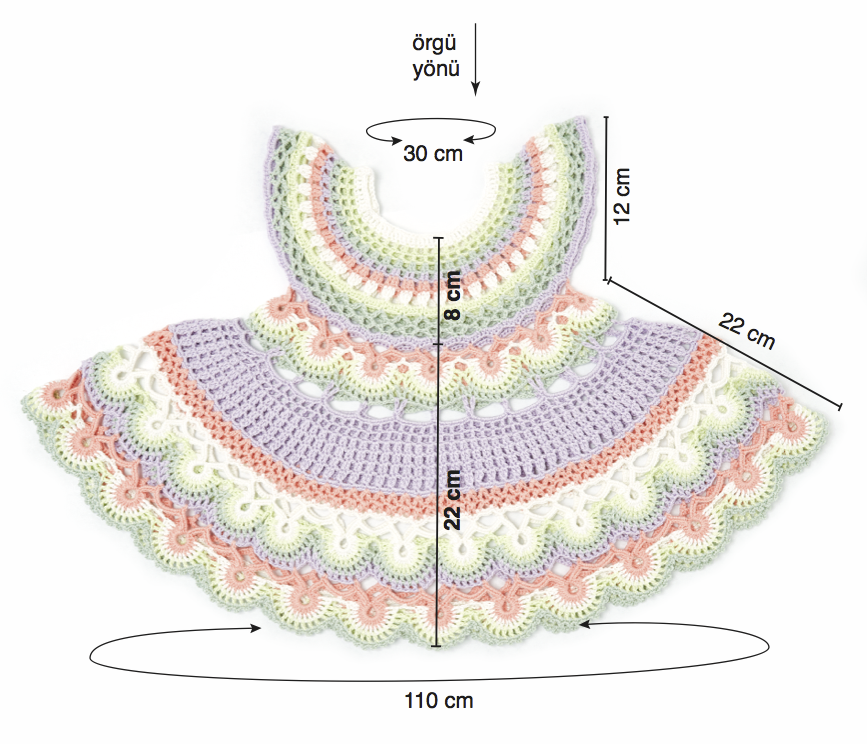
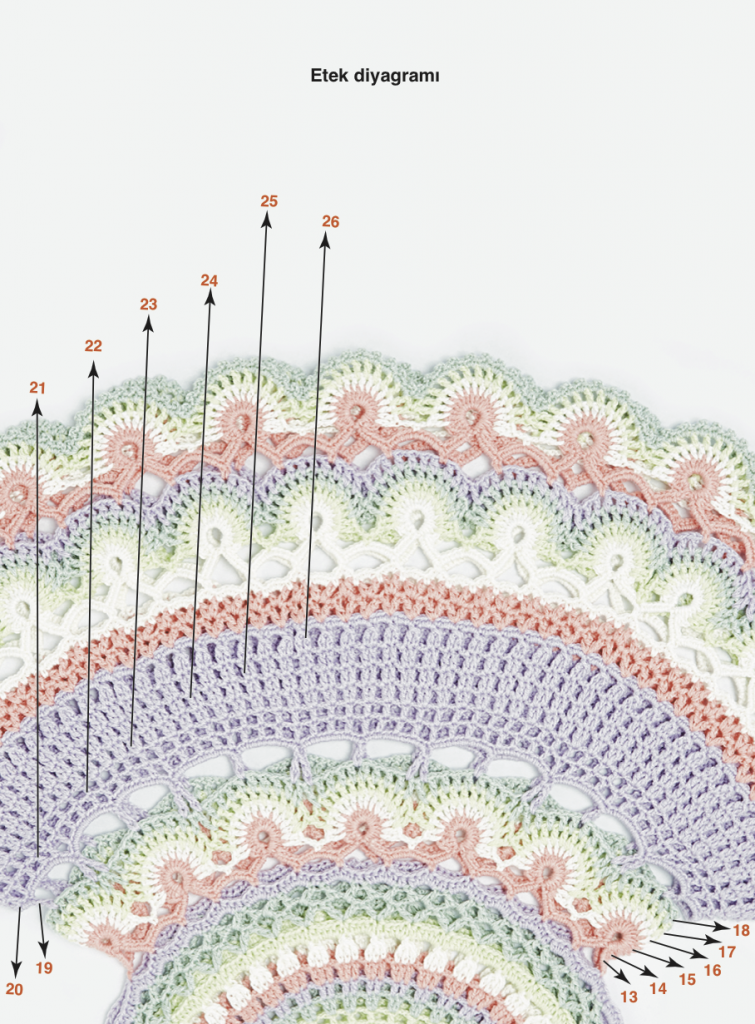
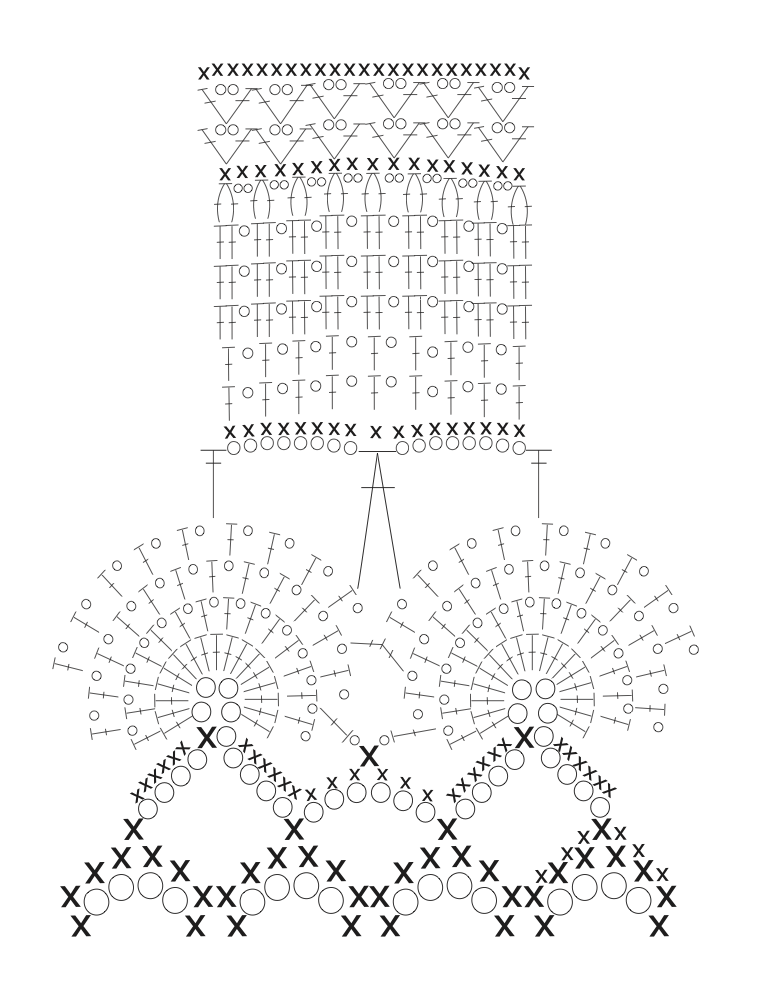
1- 110 chains are drawn from the collar with thread color no. 3782 and joined. 2- Roba diagram is knitted in 12 rows using colors. 3- From the next row, 24 cm is left for the armhole. 4- The remaining part is combined at the ends and knitted in round rows. 5- 22 cm skirt diagram is applied and finished by starting from the 13th row.
DRESS:
FRONT + BACK + ARMS:
- Start by chaining 110 stitches using the thread color no. 3782 and join the chain.
- Knit the Roba diagram in 12 rows using various colors.
- On the next row, leave 24 cm for the armhole.
- Combine the remaining part at the ends and continue knitting in rounds.
- Apply the skirt diagram for 22 cm, starting from the 13th row, and finish.
Note: Make sure to follow the pattern carefully and adjust the tension as needed to achieve the desired size and fit for your crochet dress. Additionally, feel free to customize the colors and embellishments to suit your preferences and style. Happy crocheting!
Effective time management is crucial for achieving productivity and reducing stress in both personal and professional life. By mastering the art of managing your time efficiently, you can accomplish more tasks, meet deadlines, and create a better work-life balance. Here are some practical tips to help you improve your time management skills:
Set Clear Goals:
Define your short-term and long-term goals clearly.
Break down big goals into smaller, manageable tasks.
Prioritize tasks based on their importance and urgency.
Materials:
- Worsted weight yarn (2 skeins)
- Knitting needles size US 8 (5 mm)
- Cable needle
- Yarn needle
Pattern:
- Cast on 30 stitches.
- Row 1 (Right side): Knit all stitches.
- Row 2 (Wrong side): Purl all stitches.
- Row 3: *Knit 2 stitches, purl 6 stitches, knit 2 stitches; repeat from * to end of row.
- Row 4: *Knit 2 stitches, slip 3 stitches onto cable needle and hold in front, knit 3 stitches from left needle, knit 3 stitches from cable needle; repeat from * to end of row.
- Repeat Rows 1-4 until scarf measures desired length, ending with Row 2.
- Bind off all stitches.
Finishing:
- Weave in any loose ends with a yarn needle.
- Block the scarf gently to smooth out the cable stitches and enhance the overall appearance.
This cable knit scarf pattern is perfect for both beginner and experienced knitters alike. The classic cable design adds texture and visual interest to any outfit, making it a versatile accessory for casual outings or more formal occasions.
Feel free to experiment with different yarn colors and weights to customize your scarf to match your personal style. Whether you’re knitting this for yourself or as a thoughtful gift for a loved one, this cozy accessory is sure to be a winter wardrobe staple!”
Introduction: Crocheting your own dress can be a rewarding and creative project that allows you to showcase your personal style. With the right yarn, hook, and pattern, you can create a stunning garment that fits perfectly and reflects your unique taste. Follow this crochet dress pattern to embark on your dressmaking journey:
Materials:
- Worsted weight yarn in your choice of color (approx. 1000-1500 yards)
- Crochet hook size H/8 (5.0 mm)
- Stitch markers
- Yarn needle
- Scissors
Pattern:

Bodice:
- Start by crocheting a foundation chain to fit around your bust. Join with a slip stitch to form a ring, being careful not to twist the chain.
- Work in rounds of double crochet stitches until the bodice reaches your desired length, placing stitch markers at the sides to mark armholes.
- Continue crocheting in rounds, decreasing gradually at the sides to create a tapered shape for the waist.
- Once the bodice reaches your desired length, fasten off and weave in ends.
Skirt:
- Attach yarn at one side of the bodice opening with a slip stitch.
- Chain a multiple of 3 stitches to create the desired width of the skirt.
- Work rows of double crochet stitches, increasing evenly on each row to create a flared shape.
- Continue crocheting until the skirt reaches your desired length, then fasten off and weave in ends.
Straps (Optional):
- Attach yarn at the top of one shoulder with a slip stitch.
- Chain a length of stitches to reach the desired strap width, then fasten off and weave in ends.
- Repeat on the other shoulder to create the second strap.
Finishing:
- Try on the dress and make any necessary adjustments to the fit.
- Use the yarn needle to weave in any remaining ends and secure loose stitches.
- Block the dress by gently wetting it and laying it flat to dry, shaping it to your desired dimensions.
- Once dry, your crochet dress is ready to wear and showcase your handmade style!
Conclusion: Crocheting a dress allows you to express your creativity and craftsmanship while creating a one-of-a-kind garment that fits you perfectly. With the right materials and this simple pattern, you can crochet a stylish dress that is sure to turn heads and become a staple in your wardrobe. Enjoy the process of dressmaking and wear your handmade creation with pride!
Leave a reply


