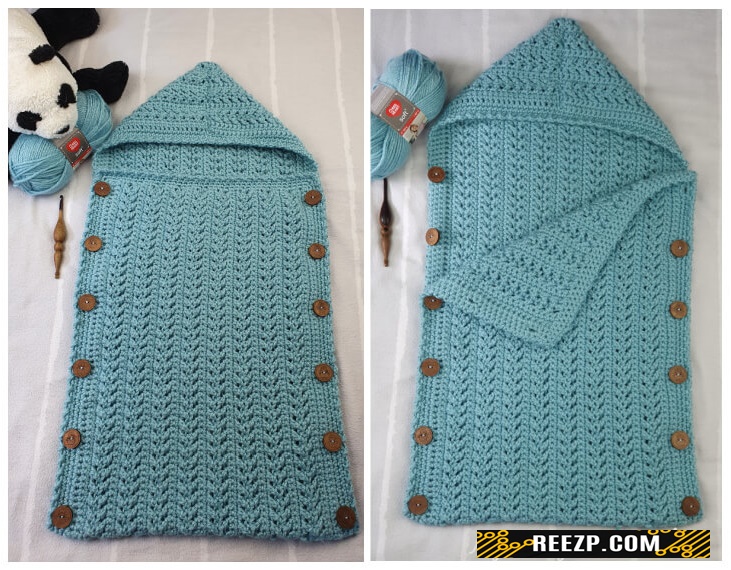
Crochet Baby Bunting Bag
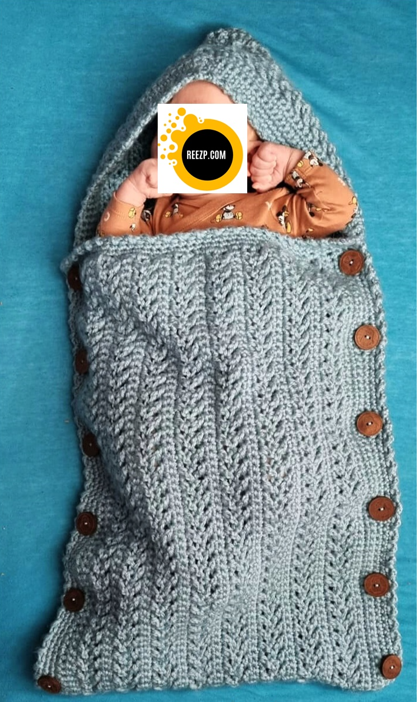
This beautiful baby bunting bag with buttons down the sides is crocheted lengthwise in rows as one rectangular piece then folded like an envelope.
 Crochet Baby Bunting,crochet baby sleeping bag
You can use this crochet baby bunting bag in a baby pram for taking the baby on walks. Please do not let the baby sleep in it unanttended!
I have created this baby bunting for warmer weather. For more warmth you can insert a fleece or jersey fabric lining, before starting the edging around the entire piece.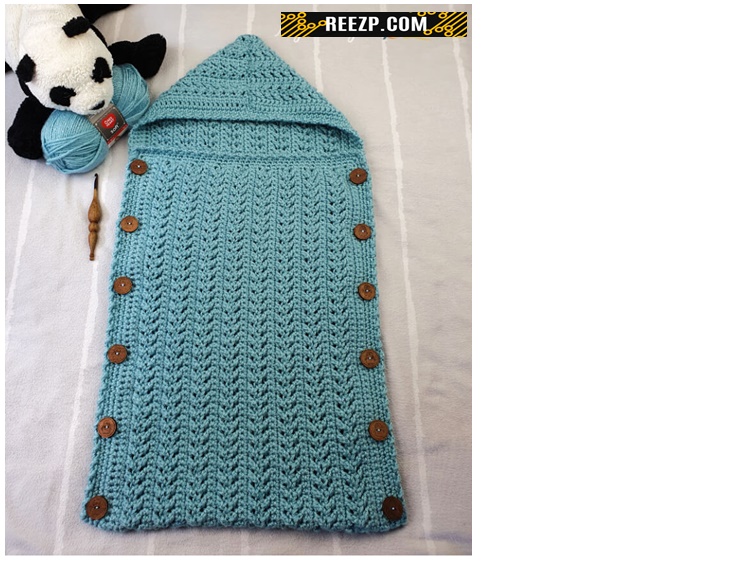
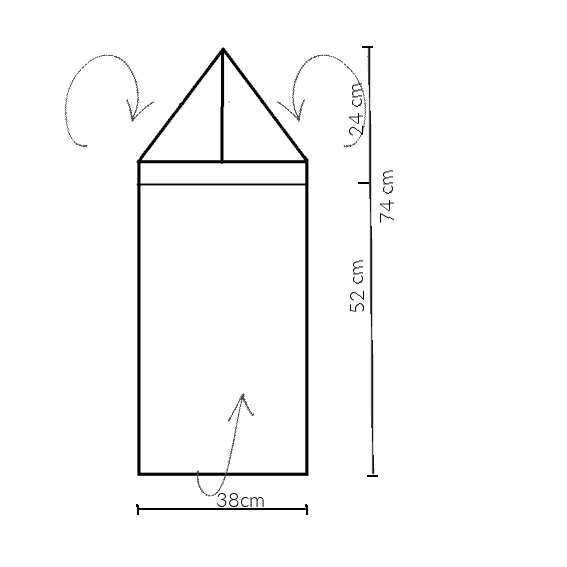
MEASUREMENTS
Approx 15″ [38 cm] wide x 29.13″ [74 cm] deep including hood; see the scheme below
 Instructions given fit infant’s size 0–6 month.Here’s a picture of my adorable little nephew (age 2 month here) in the baby bunting bag! So cute, isn’t he?
GAUGE
14 sc sts or 7 crossed dc sts = 10 cm
10 rows in pattern repeat (alternating 2 rows of sc with 2 rows of crossed sts) = 10 cm
SUPPLIES
- 4 skeins of Red Heart Soft yarn (400 g total);
- 5.5 mm crochet hook
- 12 (wooden) buttons 1″ [2.5 cm] diameter.
STITCHES AND ABBREVIATIONS (US TERMS)
- ch: chain
- ch2sp: chain two space
- st: stitch
- Sk: skip
- dc: double crochet
- RS: right side
- WS: wrong side
Special stitches:
- csdc: chainless starting double crochet
Note: To avoid gaps on the edge, I have used the csdc instead of ch3 at the beginning of rows. - fcr dc: Front Crossed Double Crochet: sk 1 st, work 1 dc into the next st, 1 dc back into skipped st going in front of the last dc just made so as not to catch it, inserting the hook into the skipped stitch from back to front of the work.
Notes:
1. The ch1 at the beginning of sc rows will not count as a st.
2. The chainless double crochet/ alternative the ch3 will count as the first st of the rows with crossed double crochet stitches.
WRITTEN INSTRUCTIONS
Chain 165.Row 1 (RS): work 1sc in 2nd ch from hook and 1sc in each chain across, turn. (164 sts)
Row 2 (WS) – Row 3 (RS): ch1, 1 sc in each st across, turn. (164 sts)
Row 4 (WS): csdc, work bcr dc across to last st, 1dc in last st, turn. ( 81 X-sts)
Row 5 (RS): csdc, work fcr dc across to last st, 1dc in last st, turn.( 81 X-sts)
Row 6 (WS) – Row 7 (RS): ch1, sc in each st across, turn. (164 sts)
Rows 8 – 35: repeat from rows 4 – 7. Basically you will alternate 1 row of back cross sts + 1 row of front cross sts with 2 rows of single crochet sts, ending with 2 rows of sc sts. Fasten off. Weave in the ends.
Row 36: ch1, 1 sc in each st across, turn. (164 sts)
Cut yarn leaving a long tail that will be used to sew the hood. Fasten off.
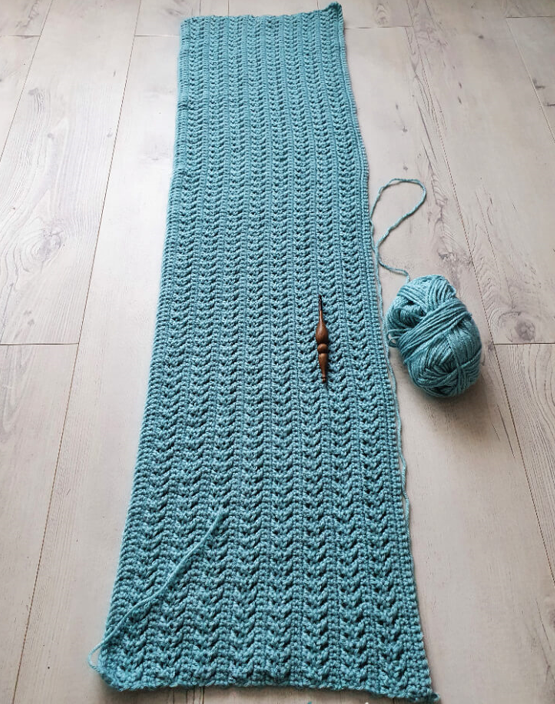
The piece is now 130 cm (approx. 51.18”) long and 33 cm wide (approx. 13”).
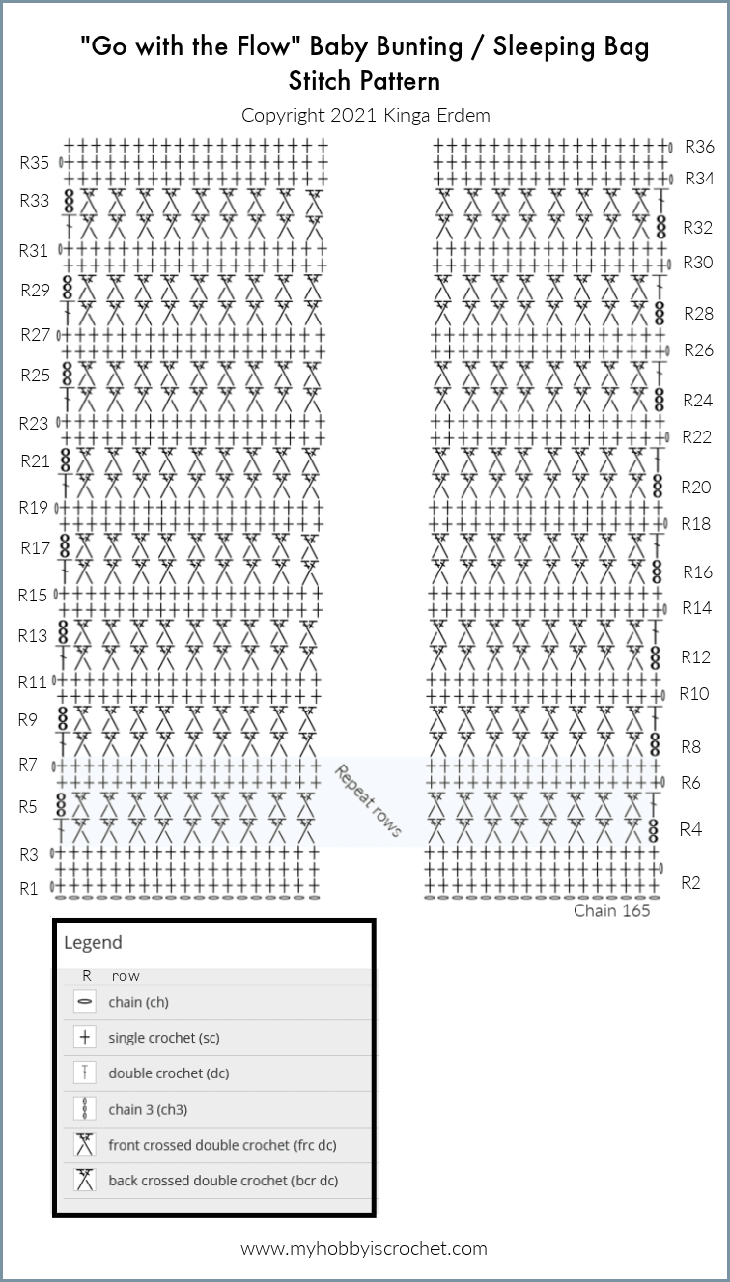
Below you can find the crochet chart for rows 1-36.
CROCHET CHART
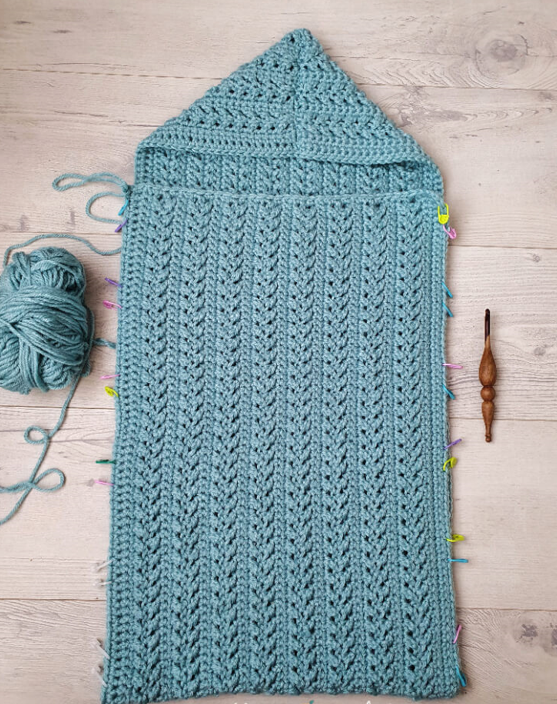
Sewing up the hood
Holding the piese with RS facing, fold one short end in half, match the two ends with the right side facing each other then sew the hood center seam. Cut yarn. Fasten off.After shaping the hood, you will crochet the edging around the entire piece working in spiral rounds without joining with a slip stitch at the end of each round.
Edging worked around the entire piece
Round 1: Holding the piece with the RS facing and the hood at your left hand, join yarn with ssc into first st on the upper long edge, and work 1 sc along the side, then around the hood, along the other side until last st; work 2 sc in last st (corner); continue to work sc along the short edge 2 st in first corner st, 1 sc in each sc row and 1 sts in each dc row, 2 sc in next corner st.
Do not cut yarn, you will continue to work in the round without joining with slst after placing the stitch markers.
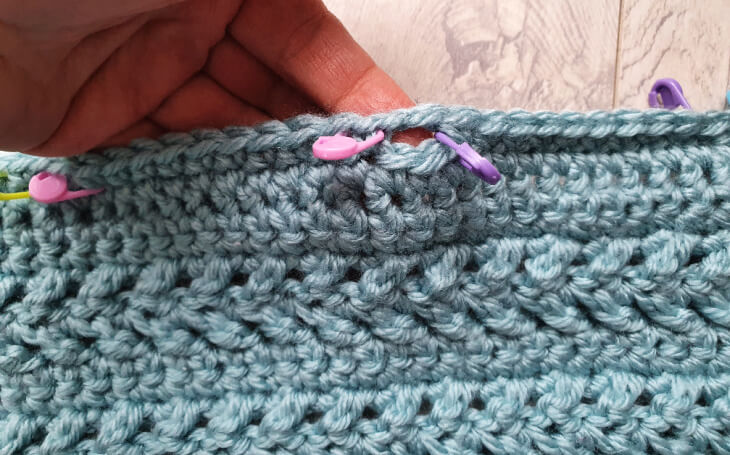
With the piece folded in shape and with RS facing, place st markers evenly on both front sides of the sleeping bag: 1st marker into first st after the corner st, sk next 2 st, place another st marker into next st, (sk next 8 sts, place a st marker into next st, sk next 2 st, place another st marker into next st) X 5 times.
See the picture below!
Notes:
1. The buttonholes will be formed by the chain 2 spaces!
2. Between buttonholes you will have 10 sc sts!
Round 2 (Forming 6 Buttonholes on both front sides):
Work 1 sc into 1st marked st, (ch2, sk next 2 sts (buttonhole), 1 sc in next marked st and 1 sc in each of next 9 sts) x 5 times, continue to work sc along the side, then along the hood, the on the other side until you reach the 1st marker on the other front side, work 1 sc into 1st marked st, (ch2, sk next 2 sts (buttonhole), 1 sc in next marked st and 1 sc in each of next 9 sts) x 5 times, ch2, sk 2, 1 sc in last st on the side; 3 sc in corner st,1 sc in each st along the short side, 3 sc in corner st; continue in spiral round without joining.
 Round 3: work 1 sc in 1st sc, 2 sc in next ch2 sp, (1 sc in each of next 10 sc between the button holes and 2 sc in next ch2 sp) x 5 times, 1 sc in each next st along the side and along the hood, then along the other long side, until you reach the first ch 2 sp on the other long side, work 2 sc in next ch2 sp, (1 sc in each of next 10 sc and 2 sc in next ch2 sp) x 5 times, 1sc in each left st till corner, 3 sc into corner st, 1 sc in each sc on along the shirt side, 3 sc in next corner st.
Do not join with slst! Continue in spiral rounds!
Round 4 : *ch1, sk 1 sc, work twsc in next sc*, repeat from *to* along the long side, then around the hood, along the other long side, ch1, sk last sc on the side, work 3 sc into corner st; repeat along the shirt side from *to*, ch 1, sk last st on shirt side, then and fasten off invisibly, joining into first corner st.
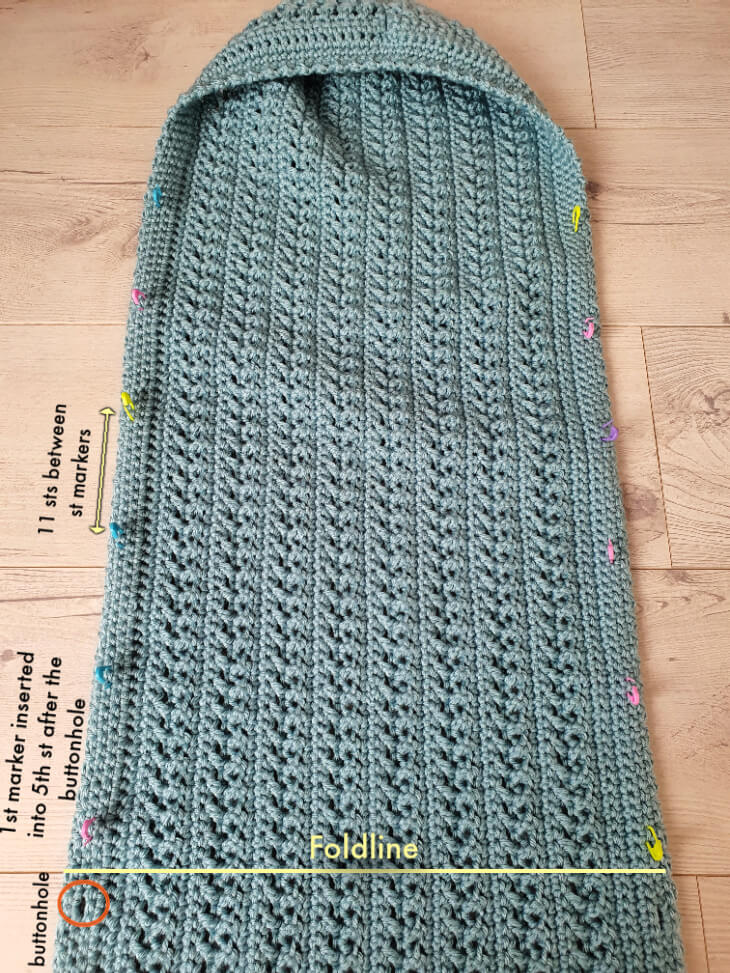
Sewing the Buttons on the folded back piece
Before sewing up the buttons, evenly place 6 stitch markers on both sides of the back piece, following along the same row where the buttonholes where made.
The first st marker (at the bottom of the bunting) will be inserted into the 5th st from the last buttonhole; then for each of the next 5 stitch markers skip 11 sts and insert the next st marker into the 12th next st.
See the picture below!
Sew the buttons securely corresponding to the stitch markers.